
Just in time for labor day weekend the much anticipated part II to my sculpting bases tutorial. I am leaving out the mold making part because I felt it wasn't necessary since you can find lots of how to's about mold making on other websites. I am just going to touch on what I did to mass produce these bases and what materials I recommend.

So I am just going to jump in and explain this process. Overall the sculpting is very easy and quite enjoyable. The stone texture takes almost no time to sculpt once you outline the pattern.


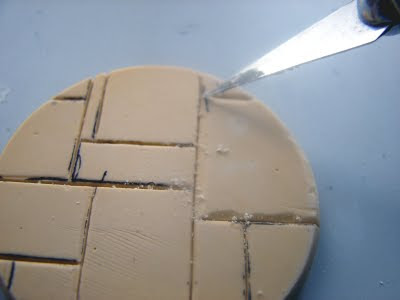
Here is where you'll need your new blade. Carefully use your Exacto to bevel the edges of each individual tile along the groove lines. I was a bit careless since I was rushing to get the sculpting done.

Next you'll take your Exacto knife and randomly carve out some grooves into the tile surface. It's better to start with just slightly carving out some grooves on the surface and carefully dig in a bit more as you go along. You'll start to get lots of plaster dust on the surface of the base(and your work table, clothes, shoes, carpet, etc etc.) so be sure to take breaks and rinse the base every once in awhile and then start sculpting again. 90% of my finger injuries have occurred while doing this step so again be careful and always be aware of what you are doing.
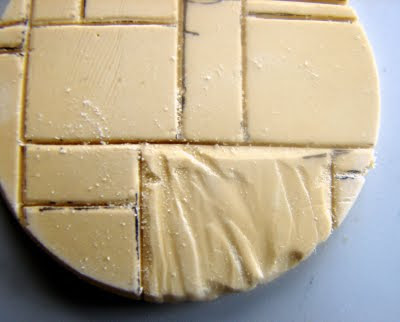
To finish off be sure to cut some grooves on the edges of the tile. So that is pretty much it. Now you just repeat the same pattern on all the other tiles. You can see I went a bit deep on the grooves but it does still give the appearance of stone. This texture works better for a dungeon theme base, whereas less grooves works for more of a road, tavern, or more civilized theme.


The tools I used for this is(from left to right):
1. Razor saw. Makes clean lines quickly and accurately. Use one of the finer toothed blades.
2. Dental pick. These work well to make grooves in the plaster blank. Check ebay for great deals on dental tools. I got a set of 5 for 6 bucks plus shipping. They also come in handy when using green stuff.
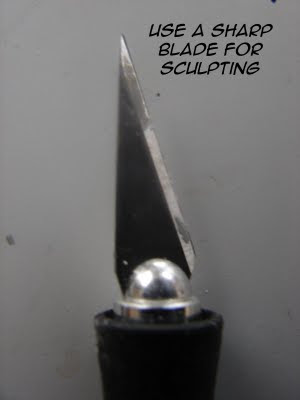
3. Exacto Knife: I have yet to meet a fellow gamer/ hobbyist who doesn't own one. You can use some old blades for part of the sculpting, but once you start texturing the stone it's best you use a new blade. Just be careful when using the exacto knife. I have a few scars on my fingers from being too careless with Exacto knives.
4. Your plaster/base blank.

Alright before you begin, I recommend you work in an area with plenty of ventilation and wear a mask to help you from inhaling plaster dust. I have asthma so I actually wear a heavy duty painter's mask when I sculpt multiple bases. Sure it's cumbersome and you feel like Darth Vader but it keeps nasty chemicals from going into your lungs. To minimize some dust, I usually get my plaster blank wet beforehand and sculpt immediately after. It almost feels like the water softens it a bit and makes it easier to carve and reduces the dust a bit. I first started out using the razor saw and etched in the lines I drew. The razor saw is the best tool for this since it grips the plaster and very neatly carves it away.

You should be able to carve the lines easily and quickly with your razor saw especially if you got the base wet beforehand. Try not to go to deep because the razor saw can very easily cut through the base fast. If the base ends up getting cut through, don't throw it out. You can still glue it back on with super glue and use it as normal to sculpt.

You also want to etch the lines on the edges of the base to give the base more detail. Again try not to cut to deep with the razor saw. You want it just enough to indicate the edge of the stone tiles.

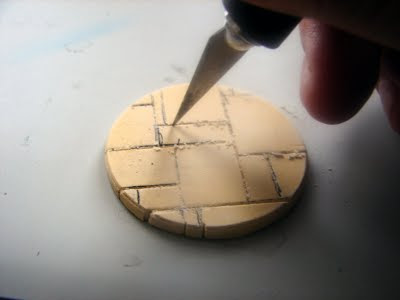
Alright the next part you are going to use the point of your Exacto knife to further sculpt the grooves. Here you can use an old blade to do this. But be sure to replace it later on with a new blade.

So basically you take your knife and carve the groove lines a bit deeper to give the stone tiles the impression of having depth.

This photo shows how you should use your knife to carve the stone tiles. I find it really carves better this way and gives you more control.

Next take your dental pick and go back through all the lines you just scraped with the Exacto knife.

I know this step seems pointless but what I actually accomplish in this step is I widen the groove lines just a bit more. The dental pick I have is a bit thicker than the pointy end of my Exacto so when I scrape along the grooves, the pick actually widens the grooves more evenly so you can see the individual stones a bit better.

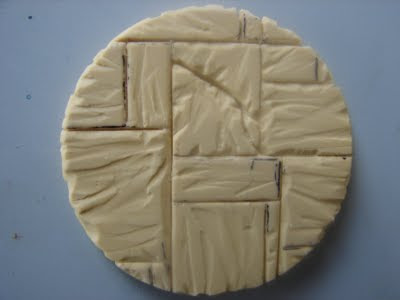
Well it's starting to take shape now. You can actually stop here and use this pattern as a ceramic type tile base. The only addition you would need would be a few bevel marks in between each tile to give it a more machined tile look. Which that actually introduces the next step.


Depending on what you want to do, you can add some more detail by taking your dental pick and scratching some cracks into some of the tiles. I've even broke some of the bases into pieces and glued it to a thin piece of round plastic card the same size of the base with some tiles removed and the holes filled with basing sand like the photo below:

The possibilities are endless on what you can do just with this type of base. The next step is to then take all the bases you made and mold them for mass production. I'll just briefly go over this process.
You basically want to form a "mold box" that can be used to mold your bases. I use a box made from Lego blocks with blue painter's tape wrapped around the inside of the box. I then use wood glue and glue the Lego box to a piece of plexiglass. Then I arrange all my bases in the box and glue them down with wood glue. I then seal the bases with Pledge FutureShine and then I wait about 24hrs. I mix some RTV silicone and pour it into the mold box and within about 12 hours I have a mold good for mass production. I've used many RTV silicone products but the best and easiest one to use is Mold Star 30 from Smooth-on. It is a 1:1 silicone that doesn't require any fancy equipment to use. Just mix and pour. Very easy for beginners and available from smoothon.com. Just be cautious when using those chemicals and always wear gloves. Silicone is hard to clean and usually requires turpentine to clean it off completely.

So there you have it folks. That is pretty much all I do to make all those wonderful little bases. If you have any questions let me know. I will post the stone pattern in my next blog post if you would like it for reference. I also occasionally sell resin cast of these bases. I only have them in 30mm, 40mm, and 50mm sizes right now and are made to fit the fancy bases used by the game Warmachine. But if you are interested let me know and I can setup a sale through Ebay or Paypal.
Thanks for your patience and sorry part 2 took so long.
Until next time
Keep on gaming!


